Guild Info
Raid Requirements

- Be MAX LEVEL for current content (currently level 50)
- Must be at minimum level 9 Artisan
- Upgrade ALL spells to EXPERT at minimum
- Have ACT Advanced Combat Tracker (https://advancedcombattracker.com/download.php) Installed with required timers.
- Language Requirements
- Orcish ( An Order of Orc Tongue )
- Giant ( Words of a Giant )
- Draconic ( Speak Like a Dragon )
- Item/Gear Requirements
- Manastone (Obtained through HQ)
- All Level 42 Mastercrafted Armor/Jewelry/Hexdolls or Best in Slot
- Best Food/Drink ( enough to last 3 hours )
- Power/Health Totems ( At least 10 charges of each )
- Power/Health Potions ( At least 20 )
- Cure Pots ( 1 stack of each Arcane, Noxious, Trauma, Elemental )
Finally: Be at zone-in ready for raid invites 5 minutes prior to start time.
NEW: Claiming Your Characters
I have been able to work with Darq the developer of Darqui to work in a feature (not available yet) to log guild member data to a text file. Using this I have been able to write a script to parse the data and upsert it into the website database. There is no longer a need for members to create their characters on the website or update them. Now all you have to do is claim/associate your character with your account by following the steps below.
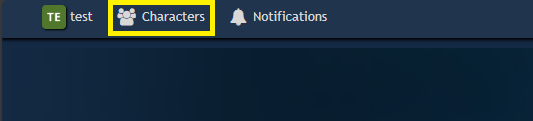
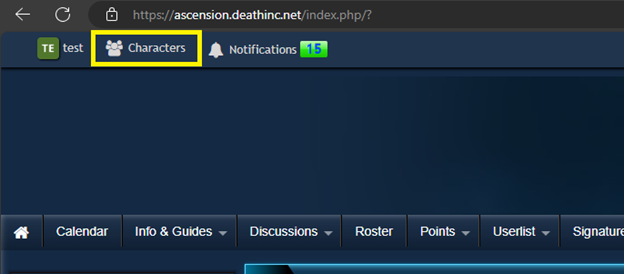
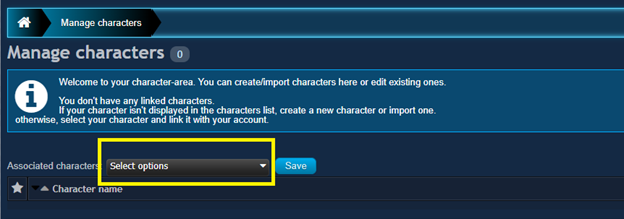
- Select "Characters" from top of the web page.
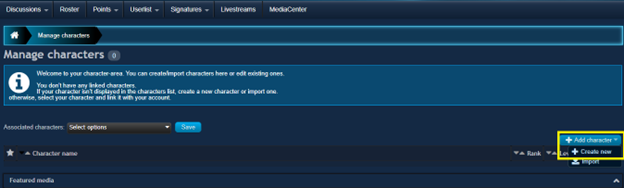
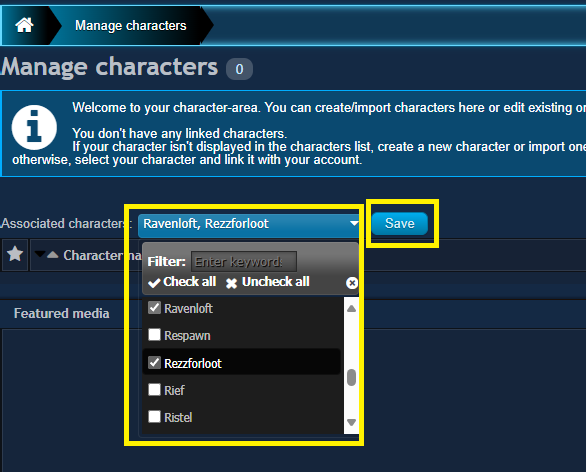
- Select the Drop Down "Associated Characters".
- Click the Check box next to your character(s) and then click save.
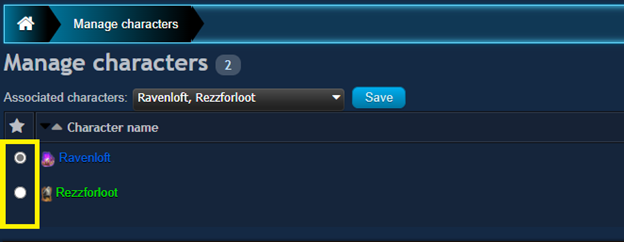
- Make sure to select which character will be you main, by clicking the radio button to the left of their name.
- That's it. Now you're ready to sign up for Raids and Guild Events.
- If by chance you do not see your character yet to select, please be patient and check back in a day or two. This is a very manual process compared to live or other TLE servers where the member data can be pulled directly from Daybreak Games API.
- If after 3 or 4 days you still do not see your character, please reach out to me.
- Notes
- Feel free to edit your character to update your Race and Gender as I can not pull these in.
- If you would like, you can also take a screen shot and upload a picture of your character.
- Please limit the pixel size of any character pictures to no more than 300 x 300
- Recommend 250 x 300
- WARNING
- Do not under any circumstances alter your characters name.
- When I import character data, it validates against current character names in the database. If the the names in the database do not match exactly to the names in the import file, they get deleted, along with any DKP.
- Do not under any circumstances alter your characters name.
UPDATED: Adding Characters to the website. NO LONGER APPLICABLE.
Because Daybreak setup the Origins server with no census (API) capabilities, I am unable to pull in guild and guild member data. Although it is no ideal, it will be necessary for you to manually create your toons and update their level and other pertinent information.
I have posted a message in the forums in hopes that they change their stance on this and implement some kind of census or other form of guild data export. I encourage you to comment and like the post. It can be found here: https://forums.everquest2.com/index.php?threads/origins-census-api.2759
- Once you are logged into the website, click on “Characters” on the top left of the Screen.
- Now Select the “+ Add Character” drop down as illustrated below, and select “+Create New”.
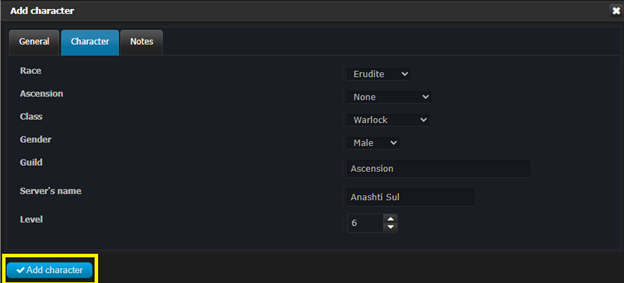
- Now fill in the following tabs: “General”, “Character”.
- General Tab:
- Enter your characters name, make sure that it matches you in game characters name exactly.
- Add a portrait/picture of your toon (optional)
- If you add a picture it will be included in the auto generated Character Signatures.
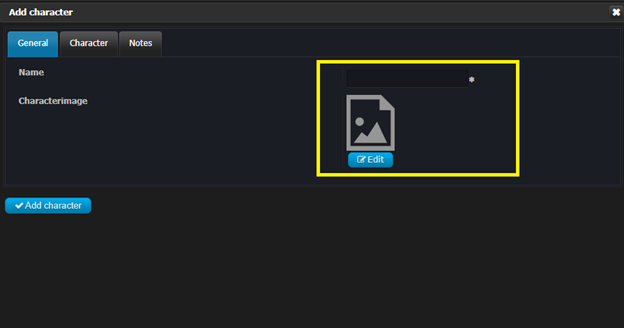
- DO NOT CLICK “Add character” YET!
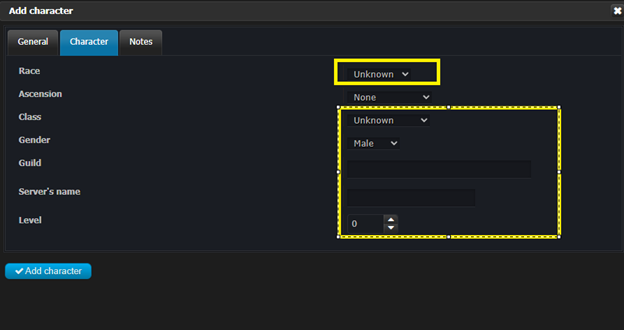
- Click the “Character” Tab and fill in the following areas: Race, Class, Gender, Guild, Server’s Name, and Level.
- These fields are important, should Daybreak later add census (API) support, when I run an import it will prevent duplicates in the system.
- You can choose to add any notes you want on the “Notes” tab, this is completely optional.
- Now Click “Add Character”
- Repeat these step for any other toons that need to be added.
- Finally you need to identify which toon is your main. Just click the radio button to the left of your character’s name.